Making your site attractive to visitors is always about great content. Great copy is one thing but having enticing images is a great way to attract users to the site. Most content management systems including our own provide automatic image manipulation of image files. However, sometimes the images you want to use can require some manual manipulation before you put them online.
This tutorial will walk you through how to to use a great free online application called Pixlr. Based on the industry standard image manipulation software Adobe Photoshop this great tool offers you many of the same tools and functionality to edit your image files. In this tutorial we walk you through resizing, cropping and adjusting images using this tool into new re-mastered files that you can later upload on to your desired site.
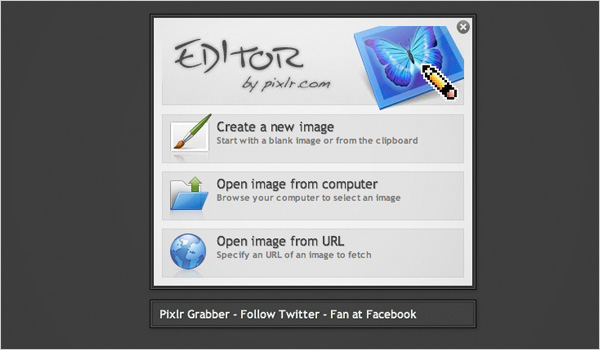
Before you begin visit the Pixlr site and click on the “open image editor” link.
Cropping
The first step in this process is to open up this image from your machine that you wish to use. You also have the option to open up images from remote urls if you have a copy of the path. For the purpose of this tutorial we will be using the popular site “Bebo”s logo.
Once you have uploaded your file you should see it in its own canvas screen which you can now start to manipulate. In our example we are going to crop the logo down to just the “B” part of the logo. On the left of your screen there is a toolbar which offers a wealth of tools to manipulate your image as you require. We are going to use the crop tool (circled in red) for this example.
Once selected you can then use the tool within your canvas area but clicking and dragging the handles over your desired area you wish to crop. As you will see below this then highlights the area and you can use the handle points in each corner to tweak your crop area.
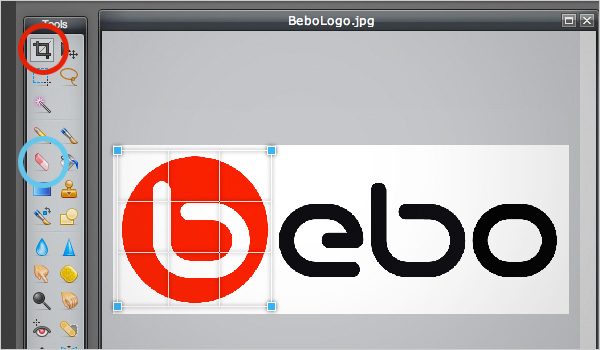
Press “enter” on your keyboard to crop the selected area and your canvas will readjust with your new image. You can use the eraser tool (circled in blue) to tidy up any stray elements on your canvas.
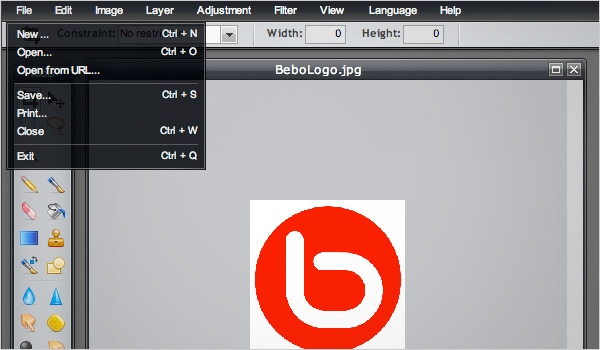
When you are happy with your image the final step is to save the new image. To do this use the “File” tab on the top menu bar and select the “Save” option from the drop down bar.
Alternatively, you can use the standard keyboard shortcuts “Ctrl+S” to save to carry out the same option. This will present you with a dialogue box where you can rename your new file and select a file type and quality.
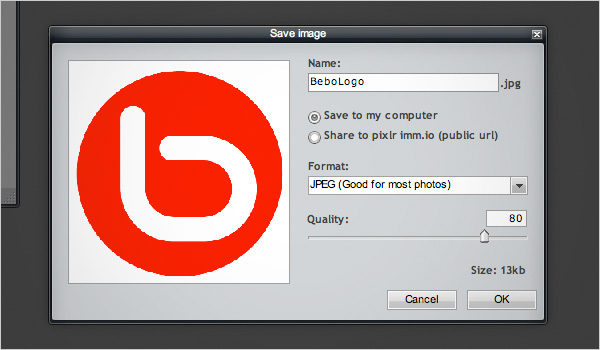
We recommend for most CMS that JPG and a quality of 80% is the best option in most cases.
Continue on to the next page for more details on how to adjust and resize images.
Resizing images
Resizing images is a similar process to the above example but even simpler. To carry this out follow the previous steps to locate and open your desired image file and open it up in Pixlr.
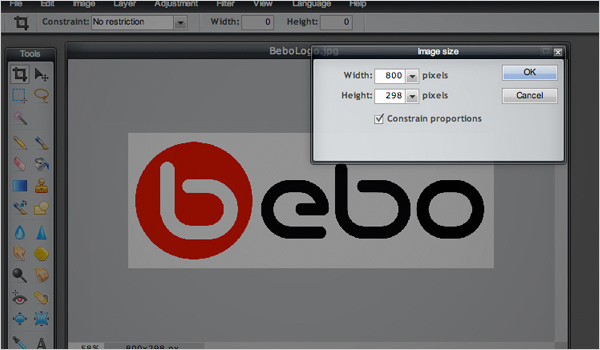
Use the toolbar at the top to select “Image > Image Resize” which should open the dialogue box that you see above. Simply enter in the new dimensions you want the image scaled to and the image will be resized. You can then use the same “Save” steps as previously mentioned to save your new resized image.
Adjusting images
This final example steps you through a more manual adjustment. Most common CMS will automatically resize an image to a specific size set by the developer. This resizing is often based on the width and height ratio of the uploaded image into the system. A way to get round this is to manually move your image, whether it is landscape or portrait, onto a new square background. This will have a ratio of 1:1 which the CMS system will maintain when it scales the image down.
To make this adjustment in Pixlr open the editor and instead of opening an image chose the first option to “Create a new image”. In the dialogue box create an image that has the same value for width and height, in our example we used 300px. This will be your base canvas that we will create your new image on.
The next step is to open, use “File > Open” from the top toolbar, this allows you to browse your local computer and select the image that you wish to lay up; again we will use the same logo. As you can see in our example you now have two canvases to work with.
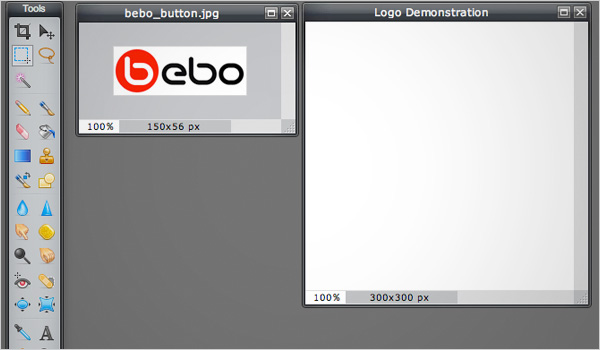
What we need to do now is move the logo onto the new square canvas that we created. To do this you need to select the logo image either using “Edit > Select All” or “Ctrl + A” on your keyboard, a dashed marquee will appear round the canvas.
To move the logo onto the square canvas simply copy the image, whilst the marque is around your selection, and then use “Edit > Cut” or “Ctrl+X” to cut the image and then select the square canvas and use “Edit > Paste” or “Ctrl + V” to paste your selected image. You can then use the “Move” tool (circled in red) to move your new image into the place that you require.
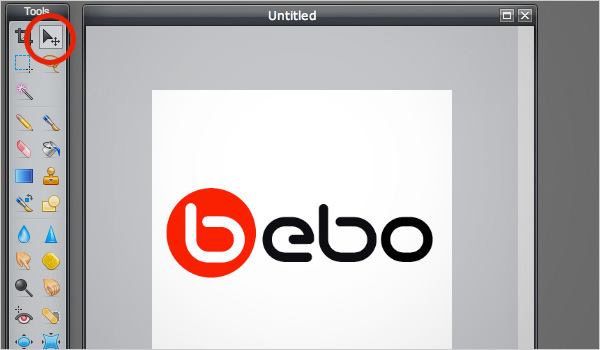
The final step is to save your new image as we stepped through before. Your new image is now ready to be uploaded to the CMS and should maintain a ration 1:1 unless it has been set differently by the developers.
I hope you have found this tutorial useful and we will post a part two to this tutorial in the future with some more advanced features of this great tool.
